Blisters in trail running: how to prevent them with the right socks
Blisters in trail running: the problem everyone underestimates
If there’s one thing that can ruin a mountain race instantly, it’s blisters. Not a muscle injury, not a sprain, not a lack of fitness. A bubble of fluid on your foot that forces you to change your stride, compensate with other joints and, in the worst case, drop out.
And the worst part: blisters are almost always preventable. 90% of cases come down to a combination of inadequate socks, unbroken-in shoes and lack of foot preparation. This guide covers everything you need to know to get your feet to the finish line in one piece.
Why blisters form when running on trails
A blister forms when there’s repeated friction between the skin and a surface (sock, shoe, seam). That friction separates the skin layers and the body fills the gap with fluid to protect the tissue underneath.
In trail running, blisters are more common than on road for three reasons:
- Uneven terrain: the foot moves inside the shoe with every rock, root and gradient change. On tarmac the stride is repetitive; on trails, every step is different.
- Moisture: puddles, streams, hours of accumulated sweat. A wet foot has 3-4 times more friction than a dry foot.
- Long distances: on a 30-50 km trail, your foot takes between 30,000 and 60,000 impacts. The skin can’t withstand that much friction without protection.
The most common hotspots
- Heel: especially if the shoe doesn’t fit snugly around the rear foot.
- Little toes: lateral compression on descents.
- Ball of the foot (metatarsals): constant friction on long climbs.
- Under the toenails: pressure on descents, which also causes black toenails.
- Between the toes: accumulated moisture plus toe-on-toe rubbing.
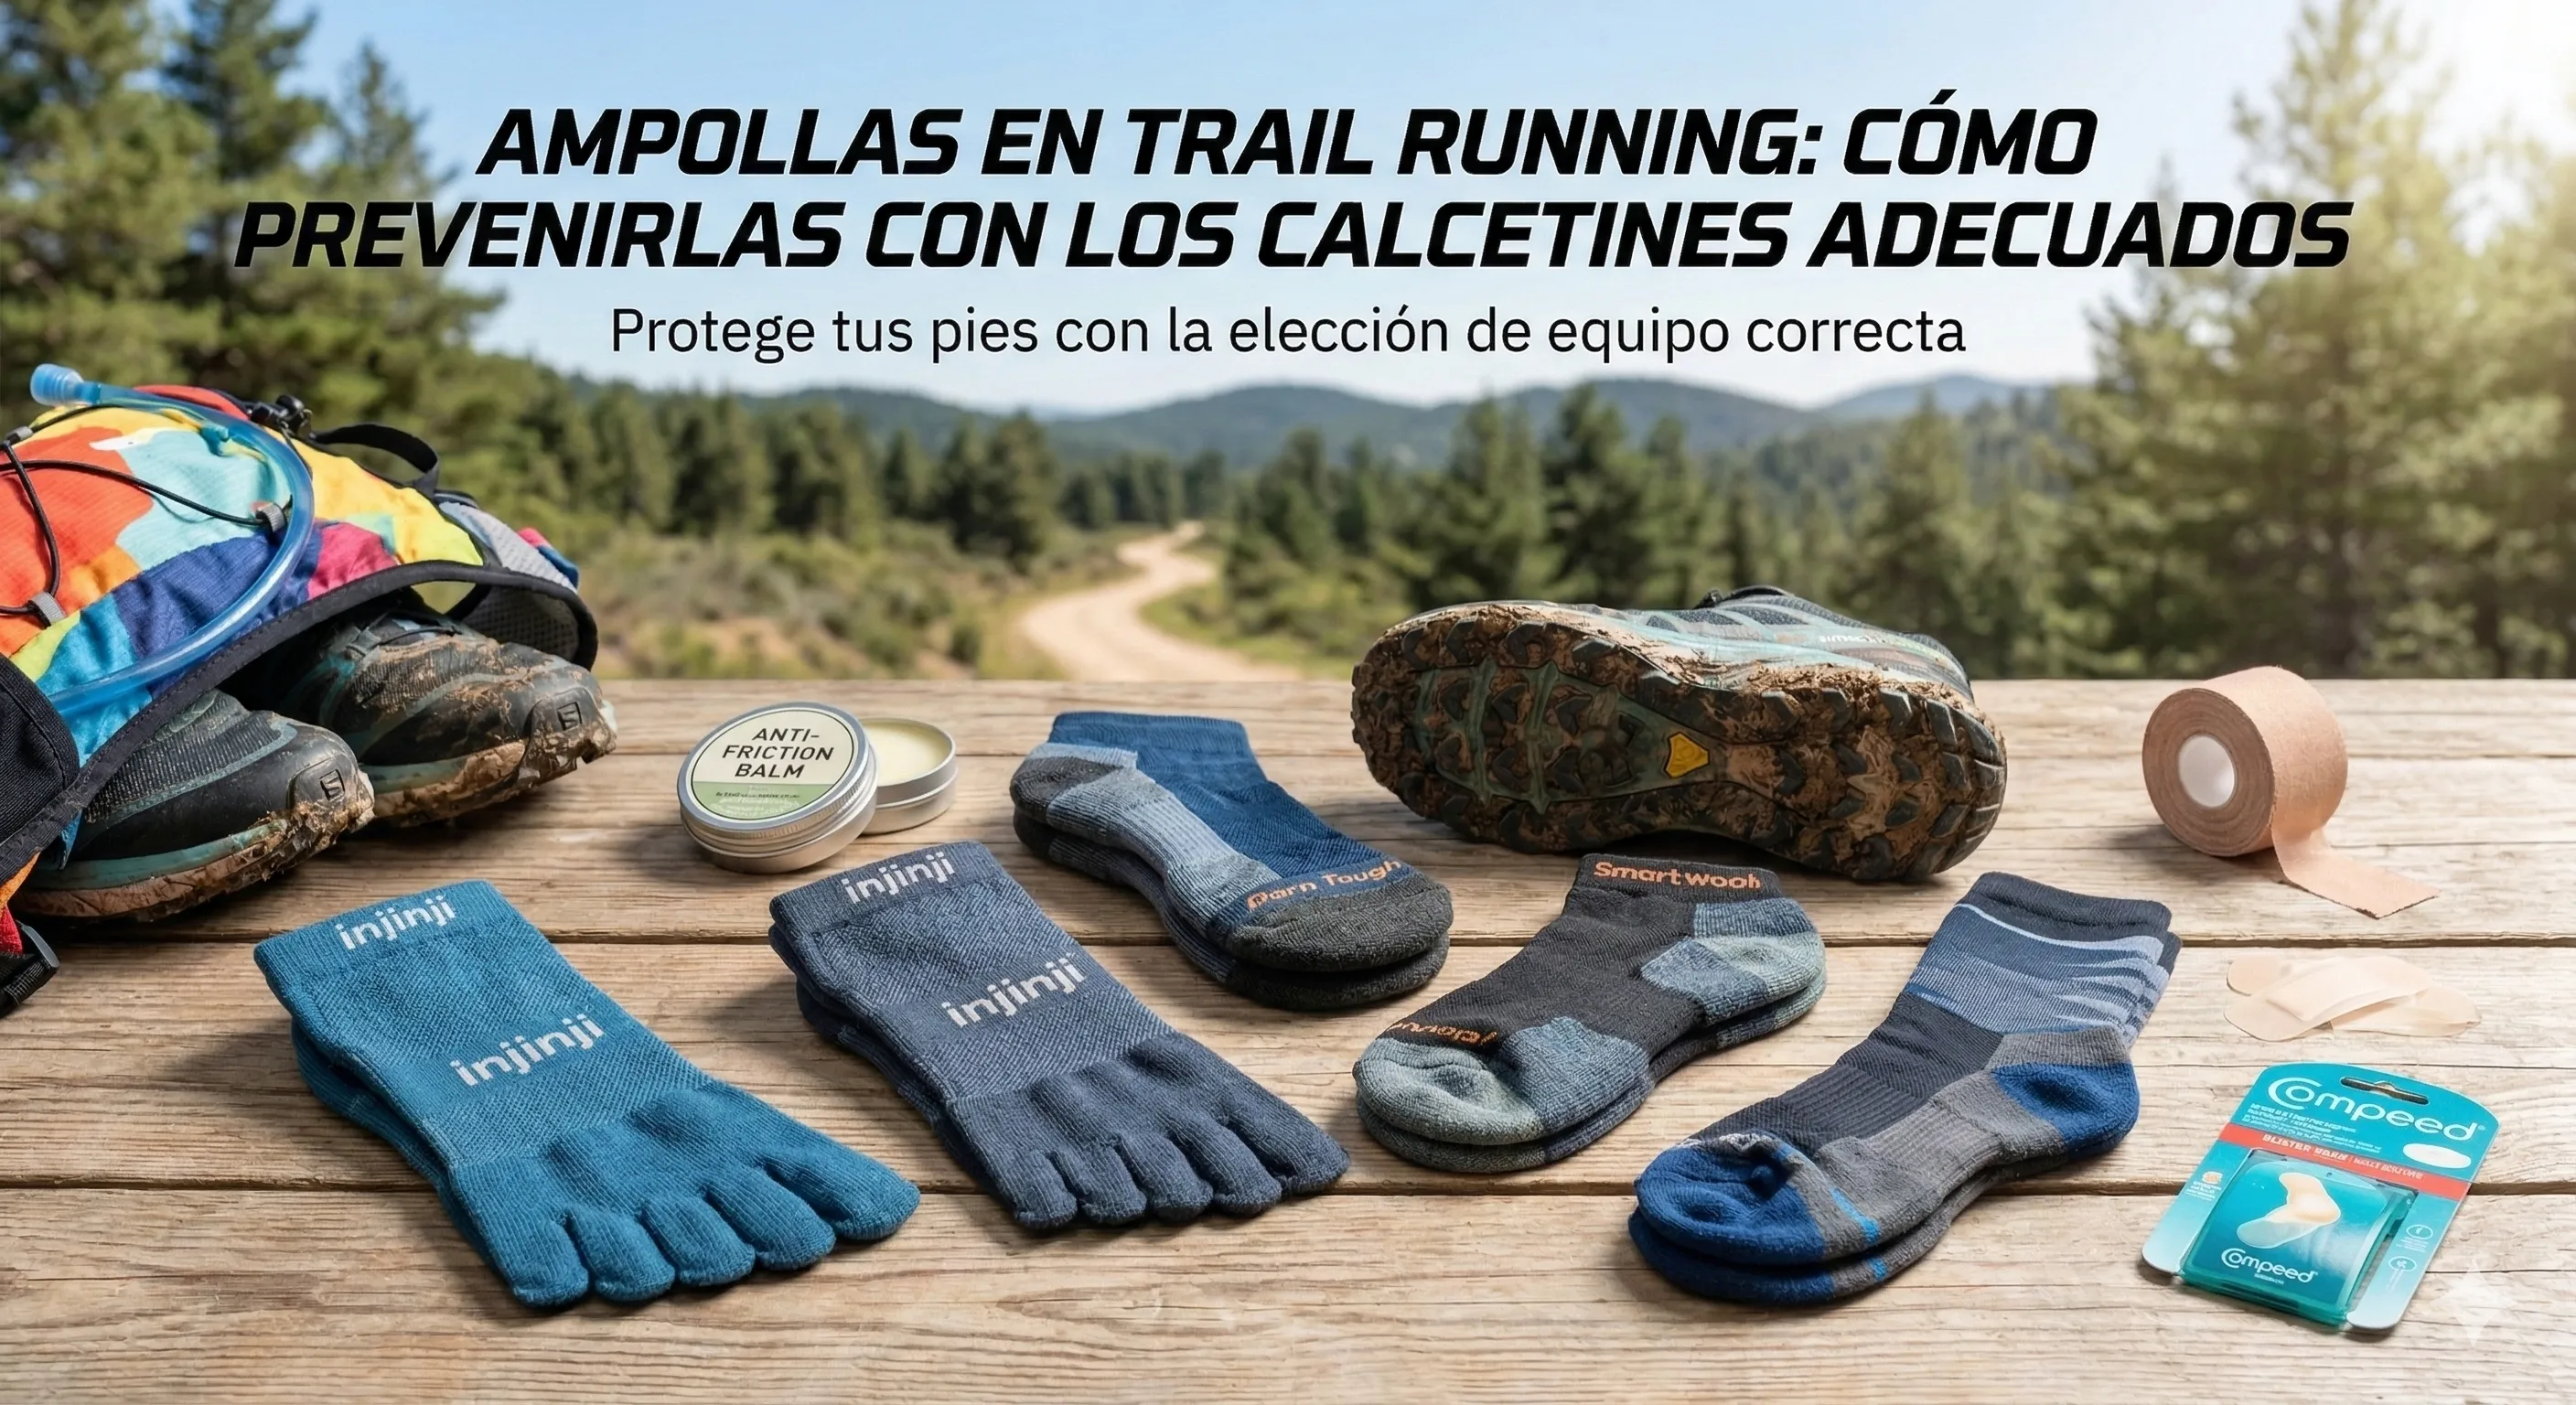
Socks: your first line of defence
If you had to make one single change to prevent blisters, it would be your socks. Above shoes, above cream. Good trail socks do three things that regular socks don’t:
1. They wick moisture away
Cotton socks absorb sweat and hold it. Your foot ends up wrapped in a damp bag for hours. Technical trail socks use synthetic fibres (polyamide, polypropylene) or merino wool that move moisture outward, keeping the foot drier.
Golden rule: never cotton. This is the number one beginner mistake. It doesn’t matter if cotton socks feel comfortable at home. On the trail, they’re a blister factory.
2. They reduce friction
Technical socks have reinforced zones (heel, toe box, metatarsal) and flat or seamless construction. Some high-end models use a double layer: an inner layer that slides against the outer one, absorbing friction before it reaches the skin.
3. They protect critical zones
Many trail socks have differentiated compression on the arch and ankle, keeping the sock in place without wrinkles. A wrinkle in the sock at the metatarsal area is a guaranteed blister by km 15.
What to look for when buying trail socks
| Feature | Why it matters |
|---|---|
| Material: merino or synthetic | Moisture wicking, quick drying |
| Height: mid-calf minimum | Protects the ankle from shoe rub and stones |
| Heel and toe reinforcements | Greater durability and protection in friction zones |
| Flat seams | Eliminates pressure points |
| Wrinkle-free fit | Removes folds that generate friction |
Reference brands
- Compressport: Trail Socks and Pro Racing Socks. Controlled compression, fast drying.
- Lurbel: Spanish brand, models like the Trail Pro. Good quality-price balance.
- Injinji: toe socks with separated toes. Eliminate toe-on-toe rubbing, ideal for interdigital blisters.
- Salomon: S/Lab and Aero range. Lightweight, good fit, designed for racing.
- X-Socks: Trail Run Energy. Zoned ventilation system.


Shoes: the other half of the equation
The best socks in the world won’t help if the shoe isn’t right. The most common mistakes:
Wrong size
The trail running rule: half a size or a full size larger than your street shoe. Feet swell during effort (up to a full size in ultras over 50 km) and on descents the foot slides forward. If your toes hit the toe cap, welcome to blisters and black toenails.
Unbroken-in shoes
Never wear brand-new shoes in a race. At least 50-80 km of training before using them in competition. The shoe needs to adapt to your foot and you need to spot any pressure points before it’s too late.
Incorrect lacing
A well-laced shoe holds the foot without compressing it. If your foot moves inside the shoe on descents, you need to adjust the lacing. Techniques like lock lacing (heel lock at the top eyelet) improve rear-foot hold and reduce heel movement.
Preparing your feet before the race
Progressive toughening
If you’re a beginner, your skin needs to adapt. Don’t try to run 30 km of trail with office feet. Start with short outings (8-12 km) on varied terrain and build up. The foot skin develops natural calluses in friction zones, but it takes weeks.
Vaseline and anti-friction creams
Applying vaseline or specific creams (Body Glide, NOK Cream, Decathlon makes their own version) before the race reduces initial friction. Apply to:
- Between the toes
- Heel
- Ball of the foot (metatarsal area)
- Any spot where you’ve had blisters before
When to apply: 15-20 minutes before the start, on dry, clean feet. For long ultras, carry a small container in your pack to reapply at aid stations.
Taping risk zones
If you have a spot that always gives you trouble, tape it before the race. Sports tape or thin blister plasters (like Compeed) applied preventively over the clean, dry area create a barrier between skin and sock.
What to do if you get a blister during a race
You’re at km 20 and you feel a hot spot on your heel. What do you do?
Stage 1: hot spot (no blister yet)
You’ve just noticed the discomfort. Stop immediately. Yes, you’ll lose 3 minutes. But if you keep running, in 2 km you’ll have a blister that costs you 30 minutes or a DNF.
- Remove your shoe and sock.
- Dry your foot.
- Check for wrinkles in the sock, small stones or misaligned seams.
- Apply vaseline or anti-friction cream to the area.
- If you have tape or a plaster, place it over the spot.
- Put your shoe back on, checking for no wrinkles.
Stage 2: formed blister (with fluid)
You already have the bubble. Options:
Option A — Don’t pop it (recommended if you can keep going): cover with a hydrocolloid plaster (like Compeed) that cushions the pressure. The fluid protects the skin underneath and the body reabsorbs it.
Option B — Drain it (only if pain prevents running): this is a last resort and requires hygiene.
- Clean the area with an antiseptic wipe.
- Pierce the edge of the blister with a sterile needle (from your first aid kit). One small puncture.
- Drain the fluid by pressing gently. Do not remove the skin.
- Apply antiseptic.
- Cover with a hydrocolloid plaster.
- Tape around it to secure.

Stage 3: open blister (skin has torn)
The worst case. You now have an open wound that will hurt with every step.
- Clean with clean water and antiseptic.
- Do not remove the loose skin: it acts as a natural dressing.
- Apply antibiotic ointment if you have it.
- Cover with gauze and tape or a large plaster.
- Assess whether you can continue. An infected open blister is a serious problem.
Blister prevention kit: what to carry in your pack
For any trail race, carry this in a small zip-lock bag:
| Item | Weight | Purpose |
|---|---|---|
| 2-3 hydrocolloid plasters (Compeed) | 10 g | Protect formed blisters |
| Vaseline (small 20 ml container) | 25 g | Reduce friction, reapply |
| Sports tape (mini roll) | 15 g | Tape zones, secure plasters |
| 2 antiseptic wipes | 5 g | Clean before treating |
| 1 sterile needle + safety pin | 2 g | Drain if necessary |
| TOTAL | ~57 g | Your blister insurance |
57 grams. That’s the weight of avoiding a DNF from blisters. Less than an energy gel.

Beginner mistakes that cause blisters
These are the mistakes we see again and again:
- Cotton socks: we’ve said it already, but it’s worth repeating. Never cotton.
- New shoes on race day: break in your shoes for at least 50 km before racing.
- Not testing new socks in training: the same principle as shoes. Test them first.
- Ignoring the hot spot: “it’ll go away” never works. It only gets worse.
- Crossing streams unprepared: if you know there are water crossings in the race, apply extra vaseline and consider carrying spare socks.
- Laces too loose: the foot moves, the heel bounces up and down, friction, blister.
- Not trimming toenails before the race: long nails create extra pressure against adjacent toes and the toe cap.
The anti-blister plan for your next race
Weeks before
- Train with the socks and shoes you’ll use on race day.
- Identify your risk zones (where you get blisters or hot spots on long training runs).
- Tape those zones on your long runs to test what works.
The night before
- Trim your toenails.
- Pack the blister kit in your pack.
- Lay out clean socks and have vaseline ready.
Race morning
- Clean, completely dry feet.
- Apply vaseline to all risk zones.
- Put on socks carefully, no wrinkles. Smooth from the toes up.
- Firm but not tight lacing. Check the heel doesn’t move.
- Keep the blister kit accessible, not buried at the bottom of your pack.
During the race
- If you feel a hot spot: stop. Three minutes now saves you a DNF later.
- At long aid stations (ultras): take off your shoes, dry your feet, reapply vaseline. Your feet will thank you for the last 20 km.
When blisters become a serious problem
Most blisters are annoying but not dangerous. However, seek medical attention if:
- The blister contains cloudy or bloody fluid: may indicate infection or a deep blister.
- Redness, heat or red lines around the blister: signs of infection.
- Fever or general malaise after the race: infection spreading.
- You can’t put weight on the foot: there may be more than a blister (stress fracture, plantar fasciitis).
A poorly treated infected blister can become cellulitis (subcutaneous tissue infection), which requires antibiotics and can keep you off the trails for weeks. Don’t take risks: when in doubt, see a doctor.
Summary: the 5 commandments of blister prevention
- Never cotton. Technical trail socks, always.
- Break in your shoes. At least 50 km before racing.
- Vaseline on risk zones. Before the race and at aid stations.
- Stop at the first warning. A hot spot is fixed in 3 minutes. A blister is not.
- Carry a blister kit. 57 grams that can save your race.
Your feet are the only contact point with the terrain for the entire race. Looking after them isn’t a luxury — it’s the bare minimum to reach the finish line enjoying the experience instead of suffering through it.
If you’re preparing for your first trail race, check out our best trail running races in Spain to find one suited to your level. And to gear up from head to toe, every race on TrailRunTemple includes a Pack 360 with everything you need.